Category Archives: Software

Interesting tools

Get the duration of a couple of audio files

I wanted to know the total duration of a couple of mp3 files, using onboard tools of a Mac. Thanks to StackOverflow, it’s as simple as:

find . -name "*.mp3" -exec afinfo {} \; | awk '/estimated duration/ { print $3 }' | paste -sd+ - | bc | awk '{printf("%d:%02d:%02d:%02d\n",($1/60/60/24),($1/60/60%24),($1/60%60),($1%60))}'

Obviously, I could have figured this out in a couple of seconds by reading some man pages. But searching the web was even more convenient. So I leave it up to you to figure out what exactly the above commands are doing. Alternatively, just use soxi :) .

OB-Xd preset location

The OB-Xd, provided by George Reales via discoDSP (and source on GitHub), is an excellent virtual analogue synthesizer emulation. It is not only available as a plugin for several DAWs, but also as a standalone app.

VSTs store individual presets as FXP files, or collections (aka banks) of them as FXB files.

In case you have downloaded an FXB file and want to install it for use in the stand alone app on a Mac, simply place the FXB in
/Users/YourUserName/Documents/discoDSP/OB-Xd/Banks/

Zynthian, the fun synthesizer

Of course I bought the V4 kit immediately, despite it’s more a project for the cold and dark season.

It took the whole eve yesterday to assemble the hardware, despite the fact I luckily had all the tools required available. Unfortunately it didn’t boot. Though the LEDs on the Raspberry PI and the soundcard lit during startup, the screen just left blank. Today I tried the following:

  • Try a new and more powerful power supply, just in case it was to weak to power all the hardware and the screen (as it happened with another Raspberry PI ages ago). This didn’t solve the issue.
  • Recheck the wireing inside the box. Everything appeared to be fine. Reconnecting the cables didn’t solve the issue.
  • Recheck the firmware image used. Heureka. I used »2020-07-27-zynthianos-buster-lite-armhf-1.0.0.zip«, despite the fact the page clearly states that releases labeled as “RC” should be more stable. I downloaded »2020-05-27-zynthianos-buster-lite-1.0.0-RC2.zip«, flashed it using Etcher and the device did start up immediately.

I connected a MIDI keybed and started Aeolus, a pipe organ emulation, on the device. Everything just worked “out of the box”. Phantastic.

I’ll check wether everything works as expected during the next couple of days. For now, I’m extremely content, thanks to the great work of all the people involved.

Setting up Korg’s logue SDK

At least during the last decade, Korg became a company which constantly generates “Products that customers love™”. From Legacy collection over Kronos to Minilogue, further to the famous Prologue and finally the Minilogue xd, Korg keeps the market busy.

The recent Minilogue xd borrows an outstanding feature from the Prologues. Users can write their very own custom oscillators and effets. To accomplish that, Korg provides the logue SDK via Github.

It is provided “as is”, with no further support, and is not easy to setup. Fortunately Grischa Ekart provides a couple of tutorial videos, the very first one sharing the essentials to get the SDK up and running. From his video, I’ve extracted the crucial steps:

  • Create a folder where you want to place your SDK. Open a terminal window there.
  • git clone https://github.com/korginc/logue-sdk.git
  • cd logue-sdk/
  • git submodule update –init
  • cd tools
  • cd gcc
  • ./get_gcc_osx.sh

I got an error message, which did not harm the further process at the moment:
./get_gcc_osx.sh: line 92: popd: directory stack empty

  • cd ..
  • cd logue-cli
  • ./get_logue_cli_osx.sh

I got two error messages, which did not harn the further process at the moment:

./get_logue_cli_osx.sh: line 35: pushd: /Users/ce/Development/Korg: No such file or directory
./get_logue_cli_osx.sh: line 98: popd: directory stack empty

  • cd ./logue-cli-osx-0.07-2b/
  • ./logue-cli
    • The logue-cli is not necessarily required, since one can transfer the files to the minilogue xd via the graphical librarian.

  • cd ..
  • cd ..
  • cd ..
  • cd platform
  • cd minilogue-xd
  • cd demos
  • cd waves
  • make
  • ls waves.waves.mnlgxdunit

The resulting file waves.mnlgxdunit is a Zip-archive. In my case, the Minilogue xd did not accept this file:

I fixed this by lowering the API version in manifest.json:

  • Change “api” : “1.1-0” to “api” : “1.0-0”
  • Save and close
  • make

Now the file is accepted by the Minilogue xd and works as expected :) .

Thanks a whole bunch to Grischa Ekart for figuring the necessary steps out.

Updating the firmware of a Korg Minilogue XD

Korg provides a firmware updater tool which does all the magic for you. It requires to turn the Minilogue XD into »Update mode«. Unfortunately, unlike advertised, neither the english nor the german manual provide any hint how to accomplish that.

On youtube I found a video explaining how to do it for the Minilogue – hold the buttons 6 and 8 pressed while powering on the device. Consequently, it’s just buttons 14 and 16 on the Minilogue XD.

Edit 2020-01-02:

After the last update, the Minilogue XD complained during startup

Update Required
Panel 1.01
Update Required
Voice 1.01

According to a Gearsluts posting, the Panel update can be performed by holding the buttons 14, Rec, and Rest while powering the on device.

I found no information for the Voice update but for the Prologue, which is buttons 5, Exit, and Shift. Translated to the Minilogue XD this turned out to be buttons 13, Rec, and Rest.

Requirements for a Metronome App

Every now and then I use a metronome while practising. I still have a traditional, spring loaded metronome available. Somewhere I must also have a digital device from the 90ties.

It was always tempting to place the metronome on top of the instrument while practising. But what I learned was that a moving pendulum or blinking LEDs distracts the player from the acoustic signal, the sheet music and the instrument. So one habit of mine was to place the metronome outside the reach of my eyes.

Since we have modern handsets at our disposal at almost any time, an app was a perfect solution. Here are a couple of requirements I have in mind:

  • Absolutely precise timing. There are many apps available, but several have difficulties coping with this non functional requirement.
  • Distraction free user interface. This removes all apps from the remaining list that are based on ads or contain animations like moving pendulums or blinking user interface elements.
  • Straightforward usage. One of the apps I used had a lot of features so that the start/stop button was difficult to locate. And when trying to start the metronome, it complained that I had to configure a couple of settings first.
  • Great user experience. The basic features should be as simple to use as possible. The Start/Stop button should be big enough to use it even at a distance of an arm.
  • Pleasant timbre. I know, de gustibus non est disputandum. But plain sine or square waves IMO sound cheap.

I really liked the Soundbrenner user interface approach, but unfortunately it failed as per the topmost and the second requirement.

After a rather long survey, I found the code of Bad Metronome, which actually provides the precision required. Ironically it provides a control to add some randomisation to its precision :) . I’m currently experimenting with the code so as to learn more about Android programming.

Die Länge von Audiodateien ermitteln

Mittels soxi lässt sich die Länge von Audiodateien auf der Kommandozeile ermitteln. Der Schalter -D liefert die Länge in Sekunden, -d in Stunden, Minuten und Sekunden:

soxi -D *.ogg
63.523039
165.384127
537.767937
156.371020
515.127347
213.252834
131.142902
70.121179
166.478095

soxi -d *.ogg
00:01:03.52
00:02:45.38
00:08:57.77
00:02:36.37
00:08:35.13
00:03:33.25
00:02:11.14
00:01:10.12
00:02:46.48

Der Notenanzeiger – zurück zum Papier

Von 2015 bis zum Sommer 2016 bestand mein Repertoire noch aus wenigen Stücken, die nicht länger als drei Seiten waren. Ich hatte sie ausgedruckt und nebeneinander aufs Notenpult gestellt. Das war zum Spielen praktisch, die Zettelwirtschaft erfordert früher oder später aber letztlich doch ein geeignetes Ablagesystem.

Inzwischen habe ich mich an drei längere Werke von sechs, acht und zehn Minuten gewagt. Die Noten bestehen jetzt aus deutlich mehr als drei Seiten. Ich habe die Stücke, nachdem die Fingersätze erarbeitet waren, ausschließlich mit einem Tablet, das annähernd A4-Größe bietet, gespielt. Es war initial nicht ganz einfach, eine funktionierende Werkzeugkette aufzubauen. Liegen die Noten aber endlich digital auf dem Tablett, komme ich bisher ganz gut damit zurecht. Vor allem bei längeren Werken finde ich das Umblättern am Tablet deutlich einfacher als physische Noten umzublättern. Allerdings gibt es immer wieder Noten, bei denen man weder mit Papier noch mit dem Tablet geeignete Stellen zum Blättern findet. Teilweise habe ich mittlerweile Stücke neu gesetzt, damit ich Einfluss auf diejenigen Stellen nehmen kann, an denen Umgeblättert werden muss.

Nach wie vor habe ich aber auch zwei- und dreiseitige Werke, bei denen es im Spielverlauf nahezu unmöglich ist, umzublättern. Das gilt vor allem für das Caprice sur les Grands Jeux von Clérambault, bei dem man mit dem Spielen derart beschäftigt ist, dass an ein Umblättern nicht zu denken ist.

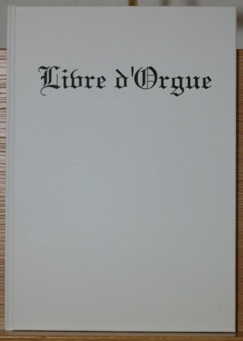
Ich habe mir daher via epubli.de mein derzeitiges Repertoire in ein Büchlein drucken lassen. Zweiseitige Stücke liegen jetzt grundsätzlich auf einer Doppelseite, so dass Blättern komplett entfällt. Von dreiseitigen Werken habe ich nur die ersten beiden Seiten auf eine Doppelseite drucken lassen. Die dritte habe ich selbst ausgedruckt und mit Klebeband so eingefügt, dass ich sie zu Spielen ausklappen kann. Auch hier entfällt das Umblättern somit komplett.

Die längeren Werke habe ich auch in das Buch aufgenommen. Während ich aber mit dem Tablet so schnell blättern kann, dass der Spielfluss erhalten bleibt, gelingt mir das mit Papier überhaupt nicht. Ich werde also für längere Werke beim Tablett bleiben.

Obwohl ich ein Tablett mit ganz ordentlichem Display gefunden habe, ist der Kontrast des Druckwerkes, zumal das Papier matt ist und keinerlei Blend- und Spiegeleffekte auftreten, deutlich besser. Für einseitige Stücke werde ich daher ebenfalls beim Papier bleiben.

Diakritische Zeichen in Unicode

Auch in Unicode gibt es mehrere Möglichkeiten, diakritische Zeichen darzustellen. Stark vereinfacht ausgedrückt kann ein Zeichen als selbstständiges Zeichen (»Ich bin ein Ä«, Normalization Form C, abgekürzt NFC) oder als zusammengesetztes Zeichen (»Ich bin ein A mit zwei Punkten darüber«, Normalization Form D, abgekürzt NFD) ausgedrückt werden.

Ich nutze ein Python-Skript auf Mac OS X, um automatisiert aus Dateinamen Tags für Ogg-Vorbis-Dateien zu generieren. Im Dateinamen von OS X liegen die diakritischen Zeichen als NFD vor. Um die Zeichenkette in NFC zu überführen, nutze ich folgenden Aufruf:

filenameNFC = unicodedata.normalize("NFC", filenameNFD.decode("utf-8"))